
A tiny diamond follows a groove in a spinning piece of plastic. Those microscopic movements somehow get turned into an electrical signal, travel through several pieces of equipment, and come out the other end as music.
Think about how ridiculous that actually is.
It’s a beautifully complicated little Rube Goldberg machine. An orchestra of moving parts, each doing one very specific job to make the whole thing work.
And as a bit of a nerd who’s fascinated by all of this, I want to break it down. Put a name to each part, explain what it actually does, and most importantly, show you how it all comes together to make music.
Table of Contents
In this guide, we’ll break down the different parts of a record player, what each one does, why it matters, and how they all work together to turn those tiny grooves into music. No engineering degree required.
- Parts of a Record Player: Labeled Diagram
- How Does a Record Player Actually Work?
- The Main Parts of a Record Player Explained
- What Else Do You Need for a Complete Vinyl Setup?
- Frequently Asked Questions About Record Player Parts
Parts of a Record Player: Labeled Diagram
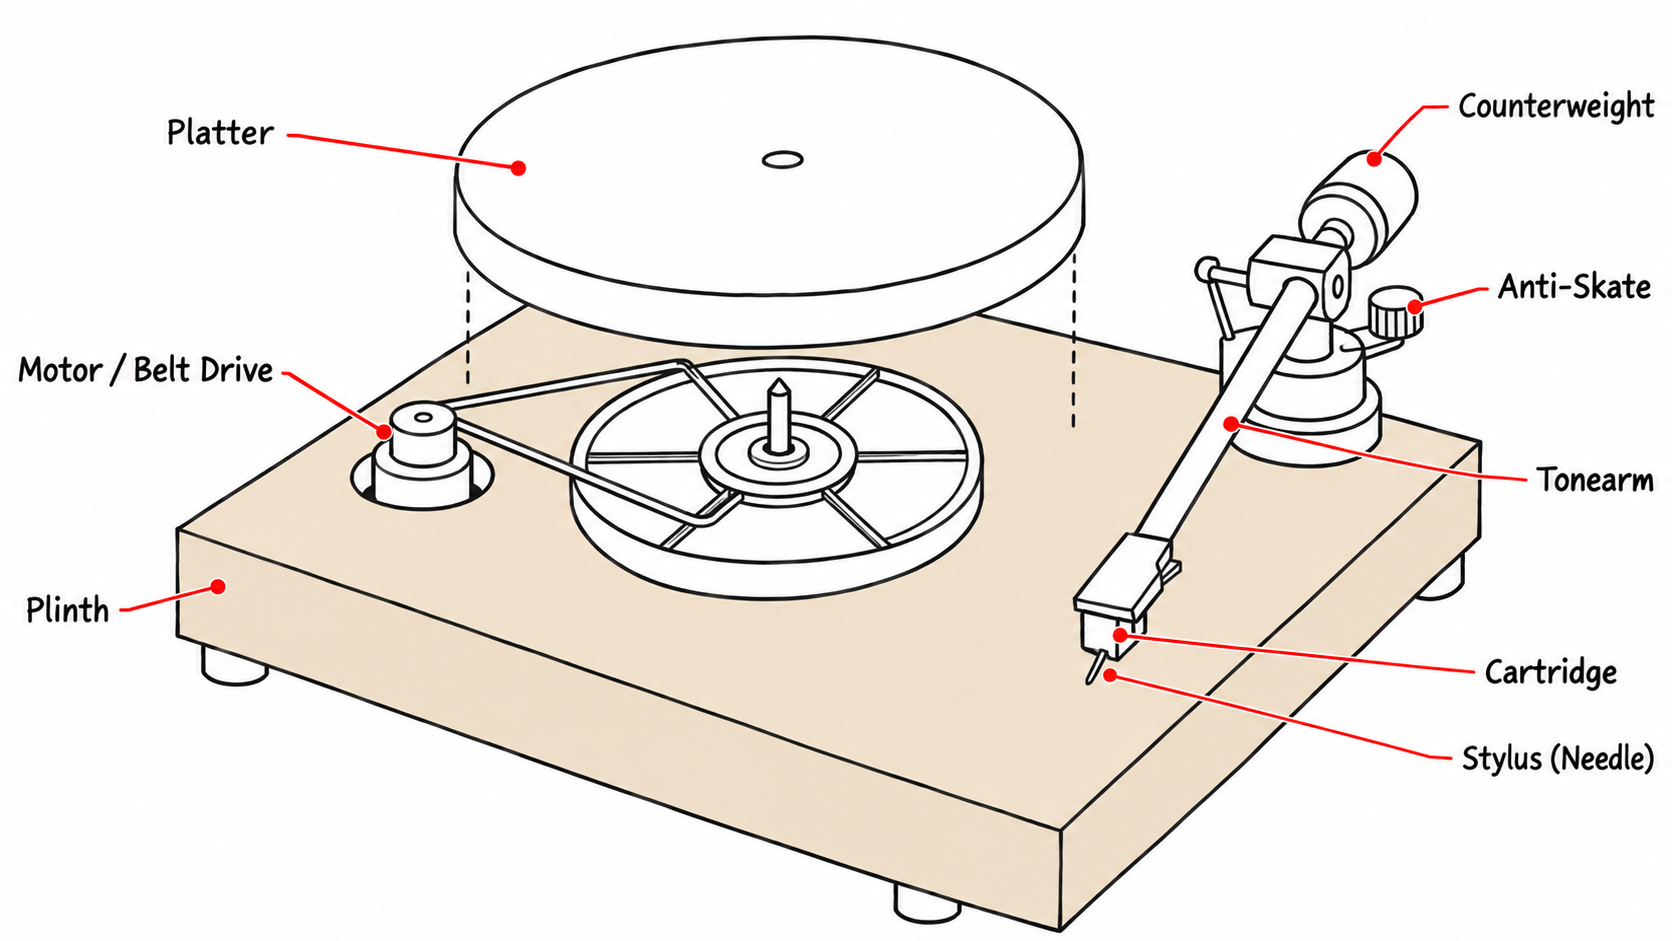
Let’s peel back the curtain. Here are the guts.
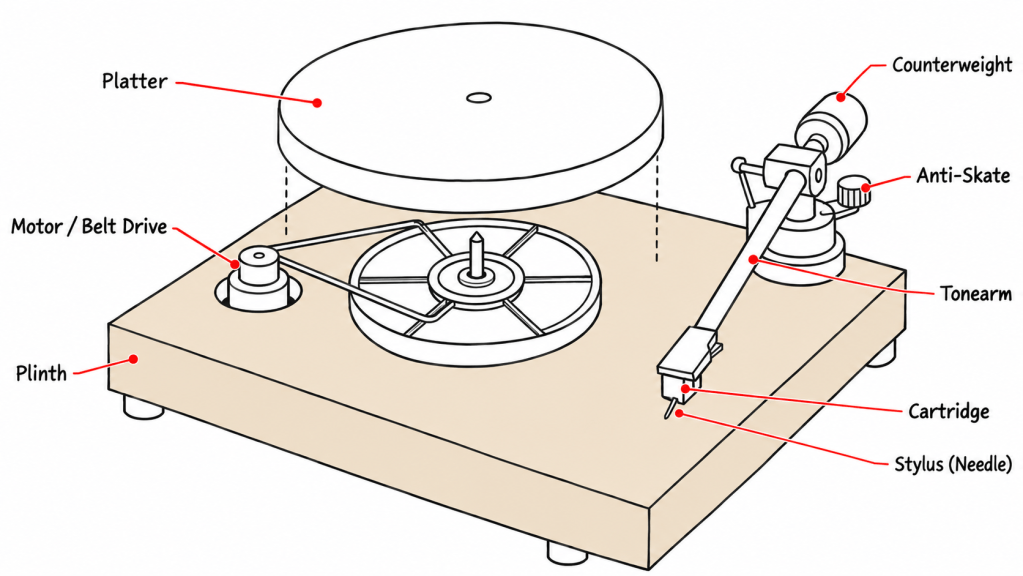
Now, this is just a broad overview of the most important parts.
At the center of your turntable is the platter, where the record sits. Off to the side, you’ve got the tonearm, with the cartridge and tiny stylus (needle) at the end. And then there are all those other knobs, weights, and switches that might not seem particularly important, but each has a job to do.
Of course, not everything is visible from the outside. The motor, phono preamp (if your turntable has one), and other electronics are often tucked away inside.
We’ll get into the individual parts, what they do, and most importantly, how they all work together next.
How Does a Record Player Actually Work?
Here’s the magic. The part where science starts to blur the edges of reality.
I find this genuinely fascinating, and honestly, a little hard to explain because it almost feels like actual magic. We’re talking about physical movement being converted into electricity, traveling through a bunch of equipment, and somehow coming out as music.
Not just noise, either. Actual music. Every instrument, every lyric, every tiny detail of a recording.
So here’s the best I can do to explain how it all works.
1. The record starts spinning.
This part is pretty simple. There’s a motor that spins the platter at a constant speed, usually 33⅓ or 45 RPM. Your record sits on top of the platter, so as the platter rotates, the record spins at that same speed. Pretty straightforward.
2. The needle follows the grooves.

When you hit play, or lower the needle yourself, the stylus settles into the grooves of the record. As the record spins, it follows the microscopic twists and turns in those grooves.
At this point, the needle is vibrating, and those tiny movements correspond to the sounds captured in the original recording.
3. Those vibrations become electricity.
Here’s the really clever part. The cartridge takes those tiny vibrations and converts them into an electrical signal.
That signal then travels through a few pieces of equipment, including a phono preamp and amplifier, which boost and prepare it for your speakers. Your speakers take that electrical signal and use it to move back and forth, pushing air and creating the sound waves you actually hear.
And somehow, we’re back where we started. Physical movement, except now it’s the speakers moving instead of a tiny diamond following a groove. Pretty incredible, right?
Now let’s get into the individual parts making all of this possible.
The Main Parts of a Record Player Explained
I’ve broken everything into three groups based on what they actually do, because every little part has a specific job.
It’s our little Rube Goldberg machine. A bunch of spinning things, tiny weights, magnets, wires, and strange inventions, all depending on one another, all doing their own ridiculous little jobs, and somehow, when everything goes right, music comes out.
The Parts That Spin the Record
First things first. We need something to spin.
The Platter
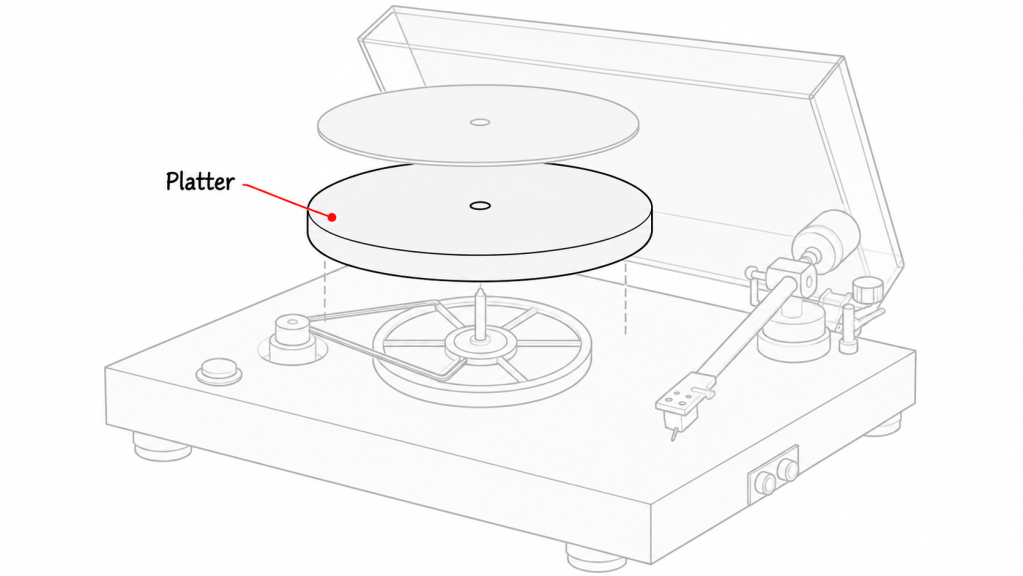
The platter is the circular platform your record sits on. Its job is simple enough, except it needs to spin at a steady speed, because even small changes can mess with the pitch of the music.
They’re made from aluminum, steel, acrylic, and all sorts of materials. Some are ridiculously heavy. Does heavier mean better? Sometimes it helps. But personally, I wouldn’t obsess over it.
The Motor and Drive System
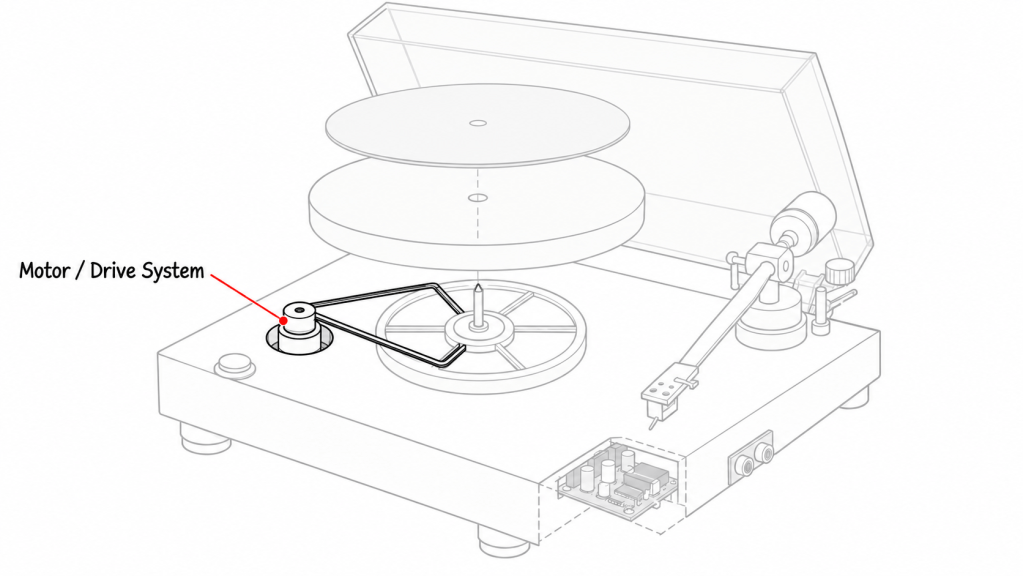
The motor spins the platter, and manufacturers have come up with two main ways of doing this.
Belt drive uses a rubber belt between the motor and platter to help reduce vibrations, while direct drive has the motor driving the platter itself.
The Spindle and Platter Mat
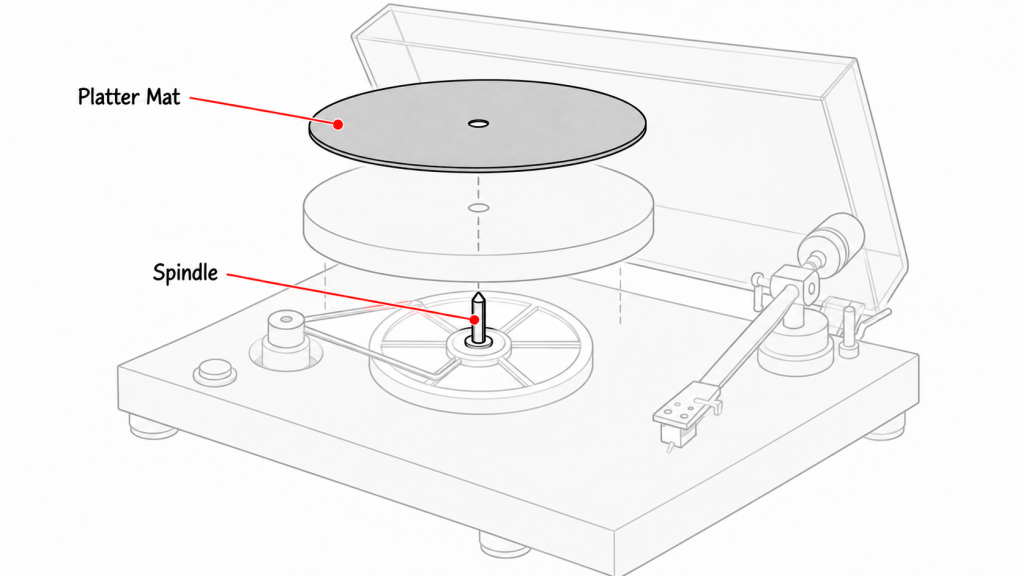
The spindle is that little metal post in the middle of the platter. It keeps your record centered.
The platter mat sits underneath the record, usually made from rubber, felt, or cork, providing grip and helping control vibrations.
Some people spend quite a bit of money experimenting with different mats.
The Parts That Touch the Record
Now we’re getting to the good stuff.
Because you can spend thousands on the perfect motor, a platter machined to incredible precision, a beautiful wooden base, and all the engineering in the world to stop even the smallest vibrations from getting through, but eventually every note, every instrument, every little detail that somebody spent weeks recording and mixing and perfecting in a studio has to pass through one single point of contact.
A diamond. That’s it.
The Stylus (Needle)
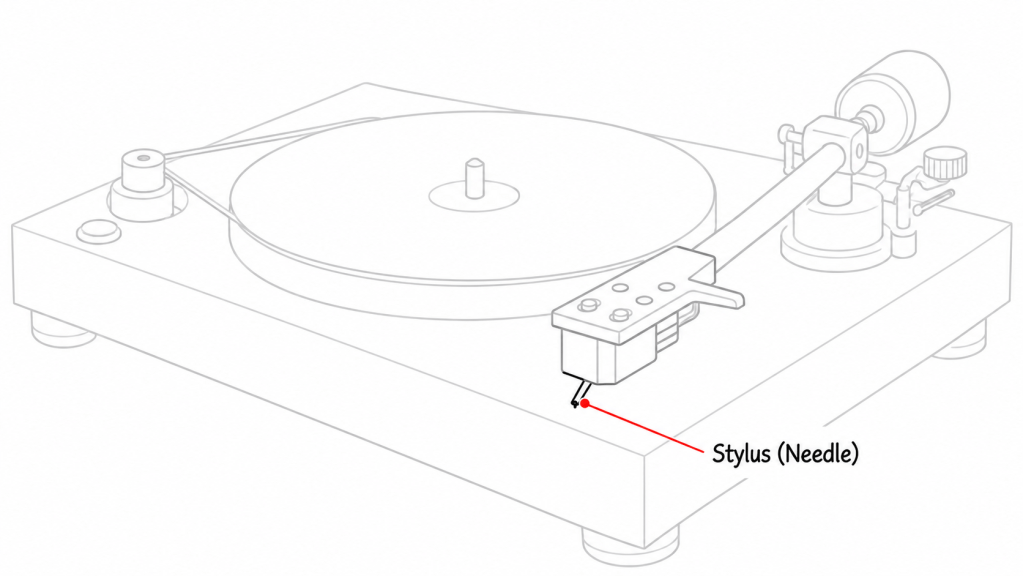
The stylus is the tiny tip that touches your record, and yes, it’s usually made from diamond.
Different stylus shapes, like conical and elliptical, follow grooves differently and can affect sound quality. They also wear out, so eventually you’ll need a replacement.
Personally, this is one of the first upgrades I’d consider.
The Cartridge
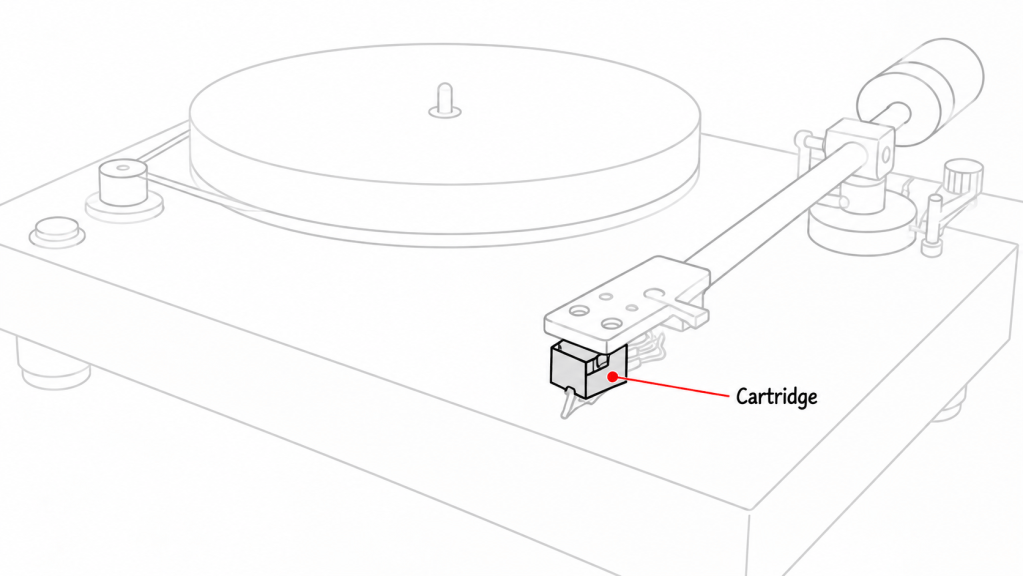
The cartridge takes those vibrations and turns them into electricity.
Inside this tiny thing, magnets and coils of wire work together to produce an electrical signal, and somehow that signal carries the information needed to recreate the entire recording, every voice and instrument, every soft little sound.
Cartridges can make a real difference in sound quality, and upgrading one can sometimes make more sense than replacing your turntable.
The Headshell
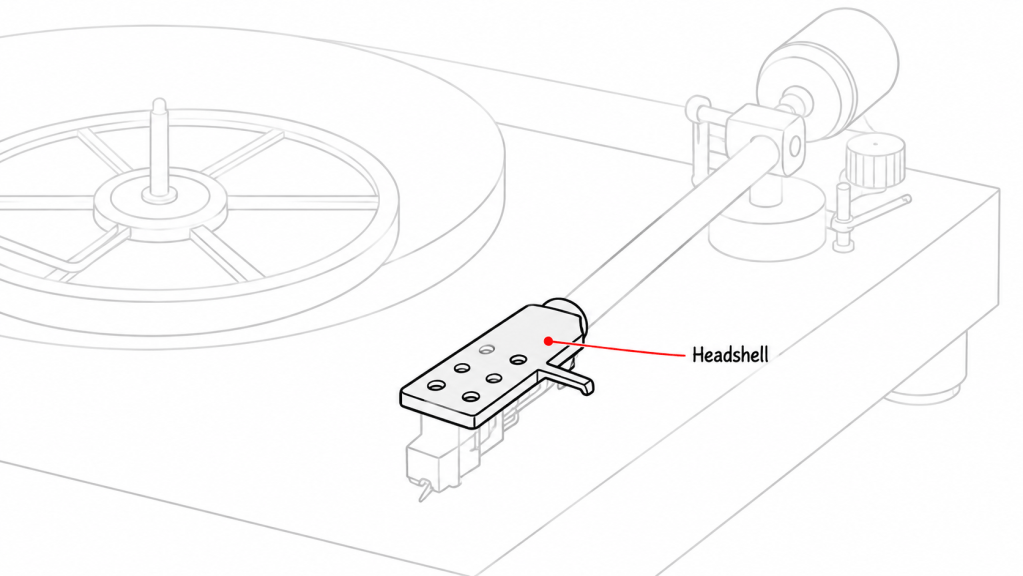
The headshell holds the cartridge at the end of the tonearm.
Some are removable, making it easier to swap cartridges, while others are fixed. Nothing I’d worry about too much as a beginner, but nice to have if you enjoy experimenting.
The Tonearm
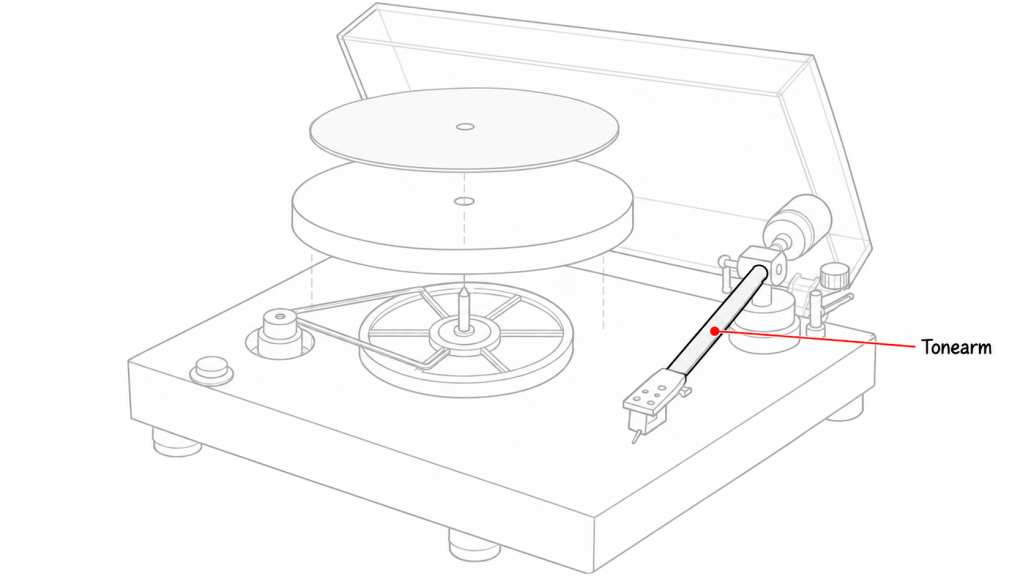
The tonearm holds the cartridge and lets the needle travel across your record, which sounds easy until you remember that it needs to move freely while keeping a tiny diamond at exactly the right angle and pressure.
Quite a balancing act.
You’ll find straight and S-shaped designs. I love the classic S-shape, although both can work beautifully.
The Counterweight
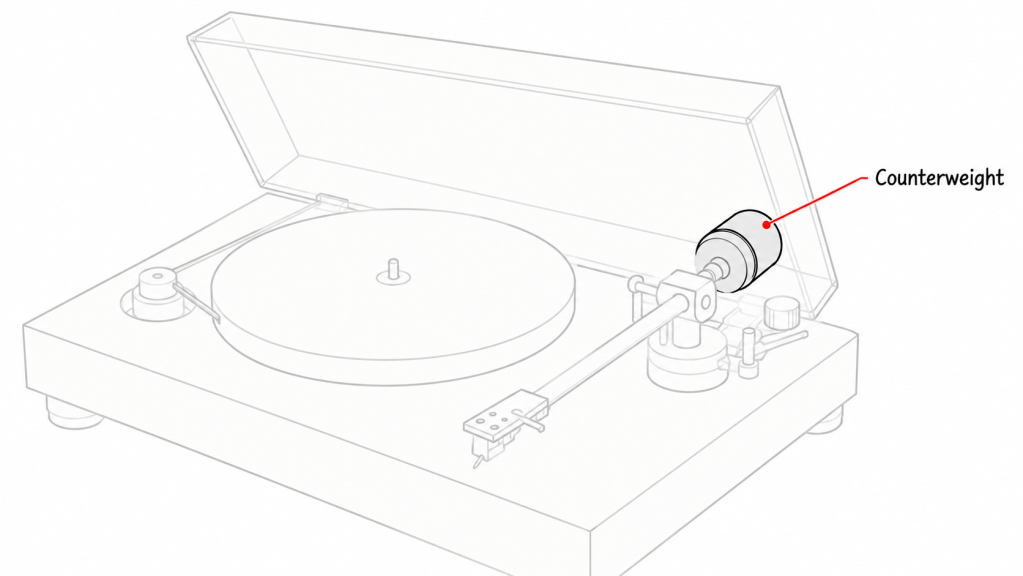
That little weight at the back of the tonearm is the counterweight.
It helps control how hard the needle presses into the groove, known as tracking force, because too little pressure causes tracking problems and too much can cause unnecessary wear.
Some turntables let you adjust it. Others come preset.
The Parts That Support and Connect Everything
Alright. We’ve got our record spinning, our diamond following the grooves, and electricity being created. But we’re not done.
The Plinth
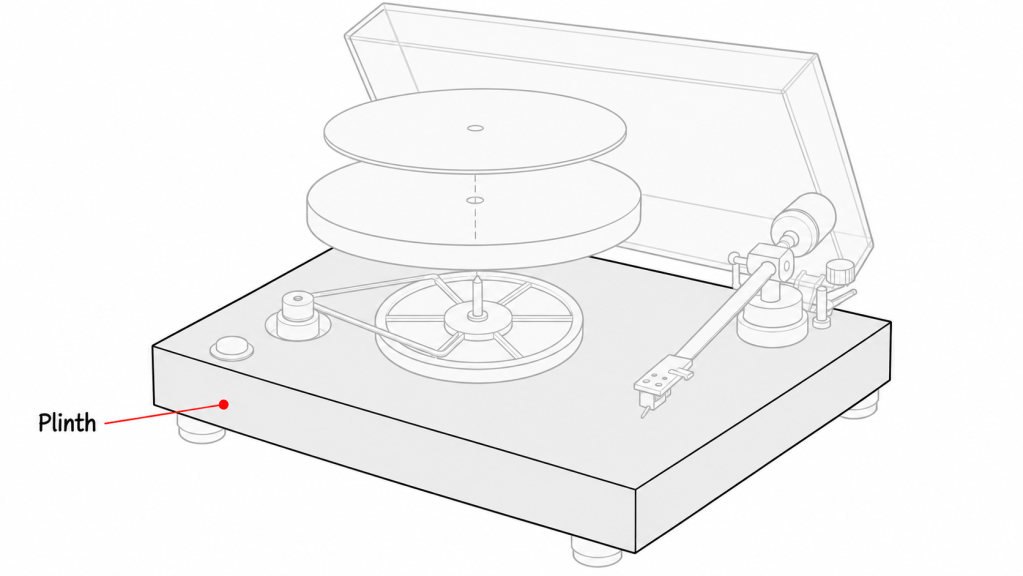
The plinth is the body of the turntable, holding all those moving parts together while helping control vibrations.
You’ll find them made from plastic, wood-based materials, metal, and acrylic.
The Feet
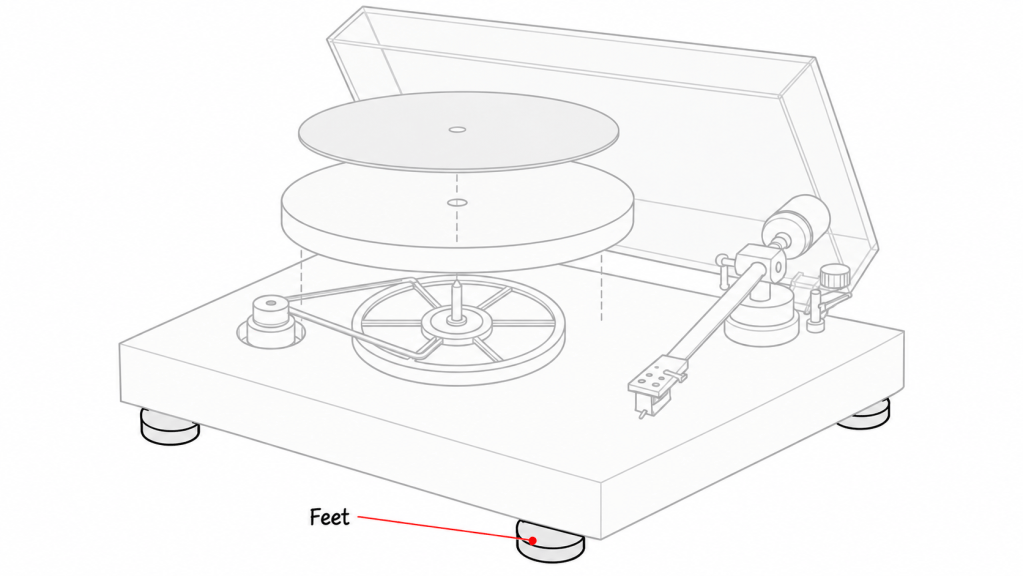
Even the feet underneath your turntable have a job.
They’re meant to keep everything stable and reduce vibrations, because imagine spending all that money getting a tiny diamond to accurately follow microscopic grooves only to have your speakers shaking the furniture, the floor moving every time somebody walks past, and all those unwanted movements traveling straight back into the needle Not ideal.
The Phono Preamp
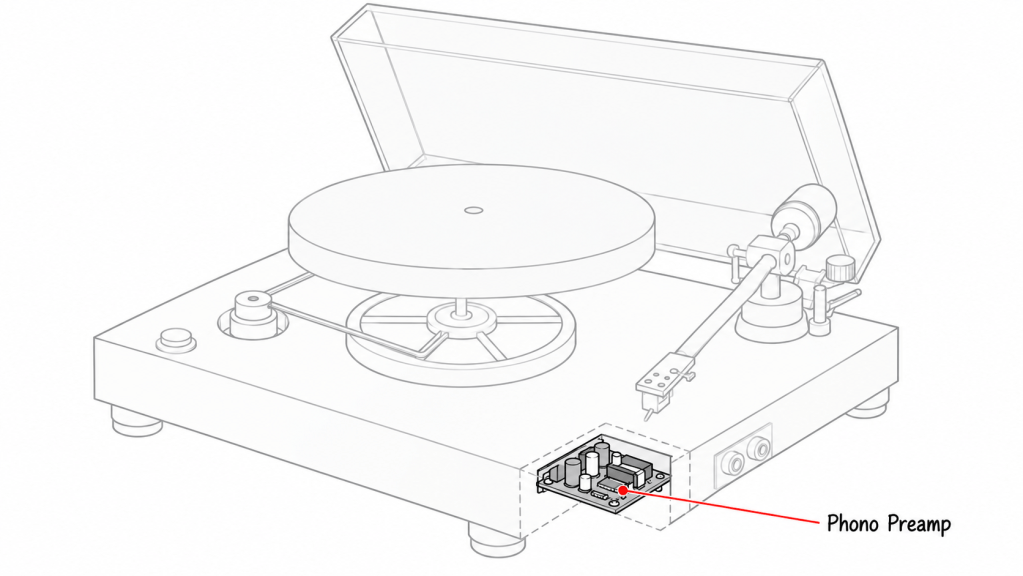
The phono preamp boosts the little electrical signal and adjusts the bass and treble so the recording sounds right. Some turntables have one built in, others need a separate one, and some amplifiers have one too.
And here’s where people start getting confused, because a phono preamp isn’t the same thing as the amplifier powering your speakers, even though both are involved in getting that tiny signal ready to become actual sound.
More on that in the next section.
RCA Outputs
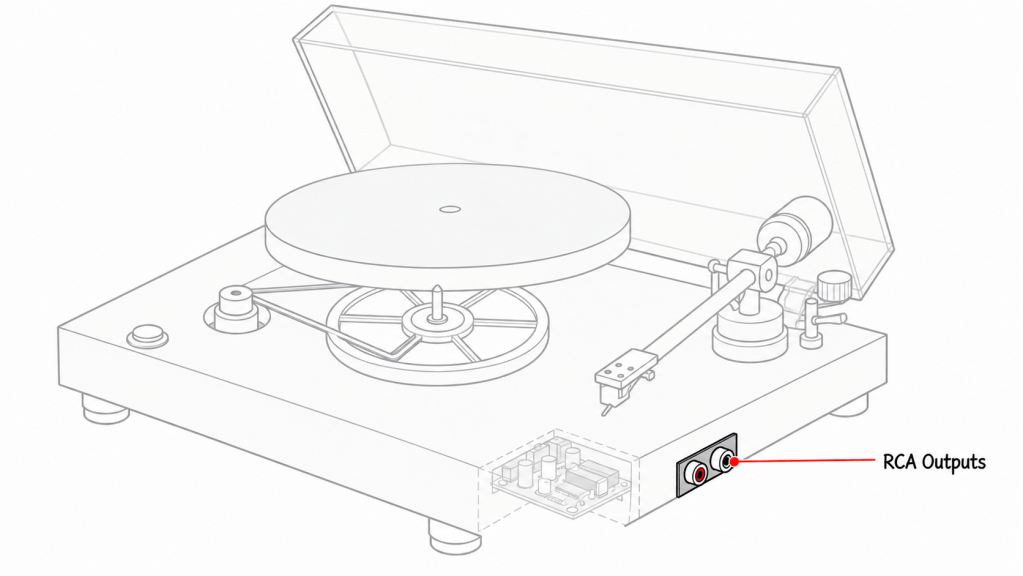
The RCA outputs are those red and white audio connections.
They carry the left and right audio signals from your turntable to the next piece of equipment.
After everything we’ve just covered, it’s almost funny how ordinary they look.
The Dust Cover
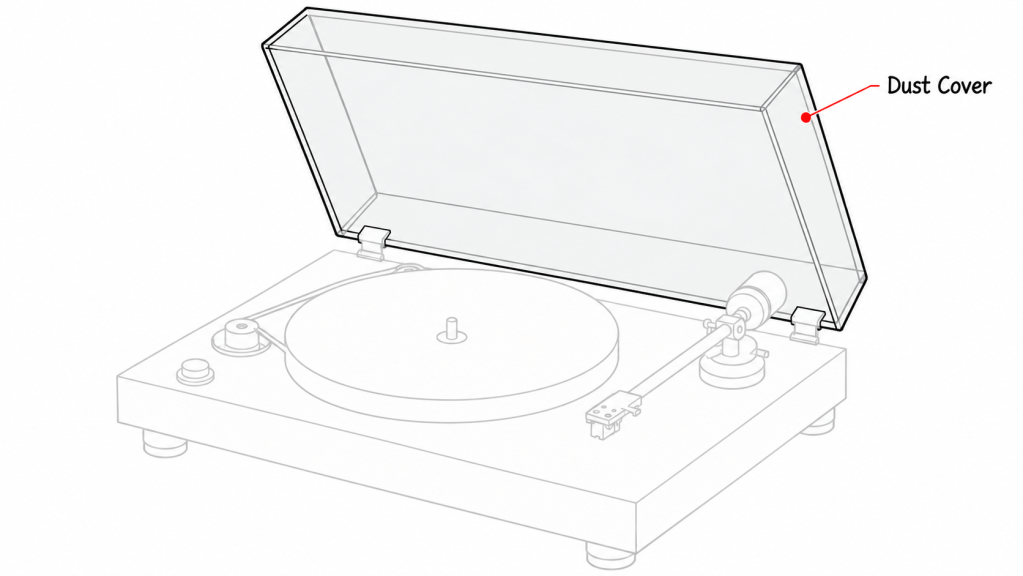
A plastic lid that keeps dust off your record player.
After all that engineering, I’m glad somebody invented a part that’s exactly as complicated as it looks.
And there you have it.
Individually, most of these things are pretty simple, a motor spins, a needle moves, a magnet generates electricity, a little weight balances an arm, but when you start stacking them together, when you realize how many tiny movements have to happen in exactly the right way, how much effort goes into keeping everything steady and quiet while this microscopic diamond drags through a groove that’s been pressed into plastic, carrying a recording made by actual people, maybe fifty years ago, maybe yesterday, and somehow preserving enough of it that you can hear a voice, a breath, the room it was recorded in, the feeling somebody put into that performance…
All from a spinning record. What a machine.
What Else Do You Need for a Complete Vinyl Setup?
Even with that perfectly orchestrated little machine, there’s still more work to be done.
And hey, I guess it’s worth it to hear music the way it’s meant to be heard. Really hear it.
Because after all that spinning, vibrating, and electrical wizardry, what we’ve actually created is a tiny electrical signal carrying all the beautiful information from your favorite Taylor Swift song. 😉
But we’ve still got to turn that into something we can actually hear.
That’s where the phono preamp, amplifier, and speakers come in. They take that little signal, boost it, give it enough power, and ultimately translate it back into physical movement, pushing air through the room and finally giving us music.
This whole process is called the signal chain, and I think understanding it is probably one of the most important things when putting together a vinyl setup.
Here’s what that looks like.
Now, this is where things can get a little confusing.
Just because there are several steps in the signal chain doesn’t mean you need a separate piece of equipment for every one of them. Some turntables have phono preamps built in, some amplifiers have them too, and powered speakers already have their own amplifiers.
So there are actually a whole bunch of different ways to put together a vinyl setup, because several of these jobs can be handled by the same piece of equipment.
You could keep it incredibly simple with just a turntable and a pair of powered speakers, or you could build something much more elaborate, with separate components handling every little step, different cartridges, amplifiers, speakers, and enough combinations to keep you experimenting for years.
It can get confusing.
But it’s also a lot of fun.
And if you’ve always wanted to get into vinyl but found figuring out all this equipment a little intimidating, that’s exactly why we built the Recordbuilds Vinyl Setup Builder.
It’s an interactive tool where you can pick out your turntable, speakers, amplifiers, and other equipment, see how everything fits together, check compatibility, and figure out what works for your budget.
You can start with something as simple as a turntable and two speakers, or keep adding and experimenting with different components until you’ve built exactly the setup you want.
Frequently Asked Questions About Record Player Parts
The main parts include the platter, motor, tonearm, stylus (needle), cartridge, counterweight, and plinth. Each has its own job, from spinning the record to turning those tiny grooves into music.
No. The stylus, or needle, is the tiny diamond tip that touches the groove. The cartridge is the part that turns the stylus’s movements into an electrical signal.
I’d pay particular attention to the stylus and cartridge. They’re the first parts to pick up the music from the groove, so their accuracy matters a lot. The tonearm, motor, and rest of the turntable still matter, too.
It depends on the stylus and how much you use it. Some need replacing after a few hundred hours, while others last much longer. Follow the manufacturer’s recommendation, and replace a damaged or worn needle.
Common causes include a dirty record, a worn stylus, an unstable surface, or the wrong tracking force. I’d start by cleaning the record and checking that the turntable is sitting on a sturdy, level surface.
Often, yes. Many turntables let you replace the stylus, change the cartridge, or swap the platter mat, although some beginner models offer fewer options. Check compatibility first.
No. You need both functions somewhere in your setup, but they can be built into other equipment. For example, a turntable with a built-in phono preamp can connect directly to a pair of powered speakers.